The Input Data Interface (IDI for short) is used to link data from an external data source (e.g. Microsoft Excel) to settings of different objects in FACTS.
Supported file formats: '.xlsx', '.xlsm' and '.csv'.
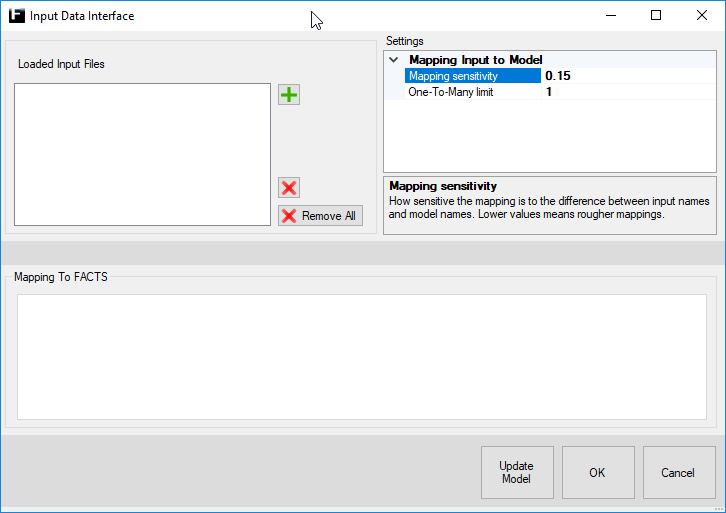
There are three main parts to the IDI:
- Loaded Input Files - Here input files are added and listed.
-
Mapping To FACTS - The actual mapping from
the input file to settings of objects in FACTS.
Note: For models with a hierarchy of Custom components and/or Selections the automatic mapping have a better chance of finding a correct match if the full path of the FACTS object is entered in the input file.
- Settings - Settings for the selected input file and its mappings.
How to use the IDI is presented through example 1 below, whereas example 2 further down shows the how to structure data for Source/Demand and Assembly objects in Excel.
|
Example model 1 
|
|
Input sheet - MachineData 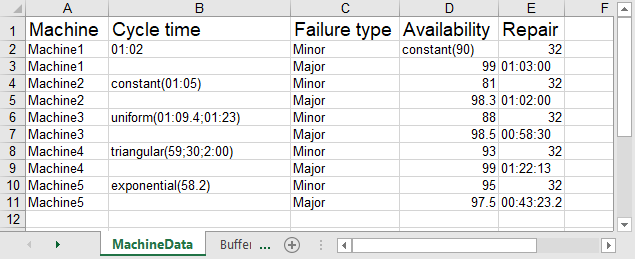
|
|
Input sheet - BufferData 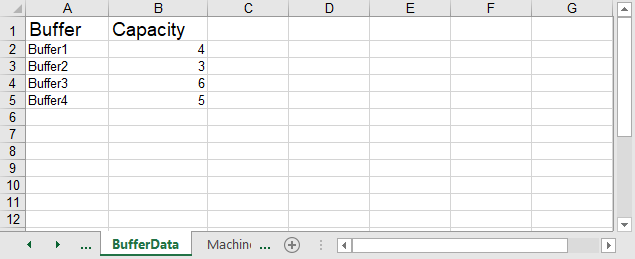
|
|
Input sheet - MachineSetupTimes 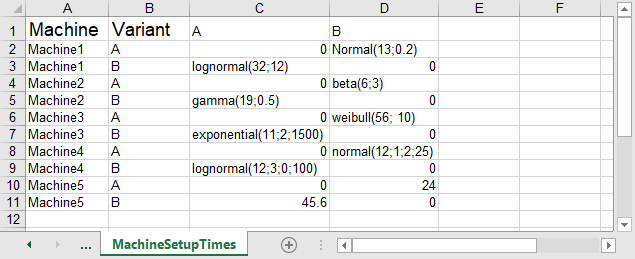
|
|
Example 1 model after update (Note: Only Minor failures visible in notes.) 
|
I. Select input files
-
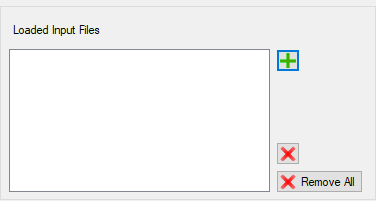 Press
Press  and browse for and select the input file.
-
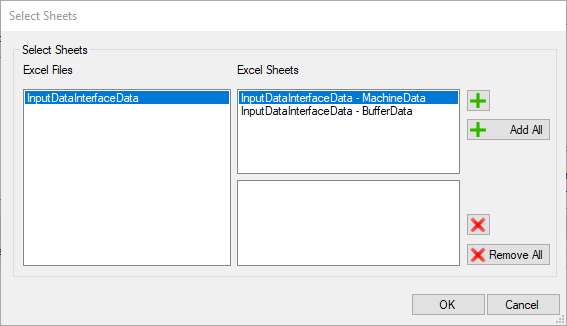 This brings up the 'Select sheets'-dialog. Add the sheets containing
relevant data by selecting them and pressing
or simply press 'Add All'.
This brings up the 'Select sheets'-dialog. Add the sheets containing
relevant data by selecting them and pressing
or simply press 'Add All'.
Use or 'Remove All' to remove added sheets.
Press and the IDI will try to map the data in the sheets to objects and
settings in FACTS.
and the IDI will try to map the data in the sheets to objects and
settings in FACTS.
II. Mapping To FACTS
-
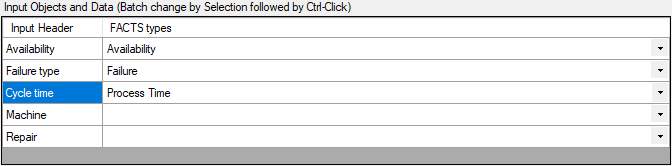 If the IDI got some header mapping wrong correct them using the drop-down
menu's of the incorrect mappings.
If the IDI got some header mapping wrong correct them using the drop-down
menu's of the incorrect mappings.
In this example we need to correct the following input headers:
- Machine=> to the object type Operation
- Repair=> to the setting MTTR
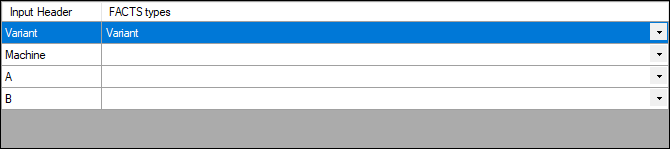
For the sheet MachineSetupTimes the following corrections are needed for input headers:
- Machine=> to the object type Operation
- A=> to the object type Variant Setup Time*
- B=> to the object type Variant Setup Time*
* HINT: With 'batch change' it is possible to map several 'Input Headers' to a single 'FACTS type' at once like this:
- First select all rows that should be mapped to the same 'FACTS type', e.g. row 'A' and 'B'.
- Then select a 'FACTS type' (e.g. 'Variant Setup Time') using a Ctrl-Click instead of an ordinary Left-Click in one of the selected rows and it will be applied to all selected rows.
-
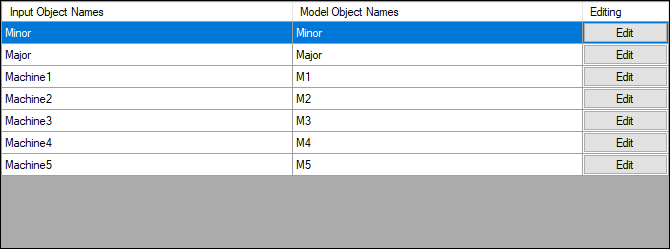 Control that the suggested mapping of objects is correct, otherwise
fix incorrect ones by pressing the 'Edit'-button (see next step).
Control that the suggested mapping of objects is correct, otherwise
fix incorrect ones by pressing the 'Edit'-button (see next step).
Note: Different disturbances are mapped as objects, in this case 'Minor' and 'Major'.
-
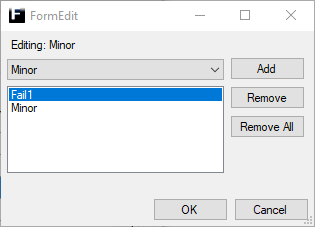 The Edit-dialog lists all model settings mapped to the input
object/cell being edited. How to add/remove model settings is described
below.
The Edit-dialog lists all model settings mapped to the input
object/cell being edited. How to add/remove model settings is described
below.
ADD:
Select desired model setting in the drop-down menu and press the 'Add'-button.
REMOVE:
Select model setting to be remove in the list and press the 'Remove'-button, or use the 'Remove All'-button to remove all listed model settings.
Note: For the purpose of demonstration (i.e. not part of this small Example) failure 'Fail1' has also been added to the input object 'Minor'.
-
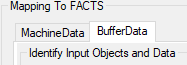 If there are more sheets, e.g. BufferData, select each sheet by pressing
its tab and repeat step 1, 2 and 3 above.
If there are more sheets, e.g. BufferData, select each sheet by pressing
its tab and repeat step 1, 2 and 3 above.
-
Now the mapping is complete and the last step is the three options at
the bottom of the IDI-dialog.
-
 - Use the created/changed mapping to update mapped settings in the
model.
- Use the created/changed mapping to update mapped settings in the
model.
Note: This will close the IDI-dialog.
-
 - Keep the created/changed mapping and close the IDI-dialog.
Note: The mapping isn't saved until the model is saved and unless 'Update Model'-button was pressed no changes are made to the model.
-
 - Discard the created/changed mapping and close the IDI-dialog.
-
III. Settings
-
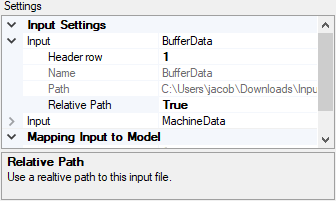 This dialog lists settings for the different sheets along with
some general settings for the mappings. E.g. one can specify the row
number of the row containing headers and whether or not paths to the
input files should be stored as relative or absolute etc.
This dialog lists settings for the different sheets along with
some general settings for the mappings. E.g. one can specify the row
number of the row containing headers and whether or not paths to the
input files should be stored as relative or absolute etc.
Note: By selecting a setting a short description is shown in the window below all settings.
|
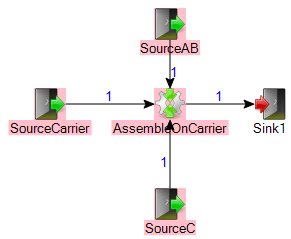
Example model 2 A simple model with three Sources and an Assembly and the four variants A, B, C and Carrier.
|
|
Input sheet - SourceData 
|
|
Input sheet - AssemblyData 
|
|
Example model 2 after update. 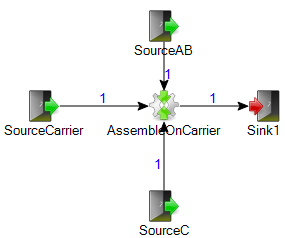
|